Here are some useful tips and tricks, while working with Ableton Live 10. Most of them are already notorious amongst producers or bedroom music makers, but we're sure that you'll find the article useful, least as a point of reference for at hand material.
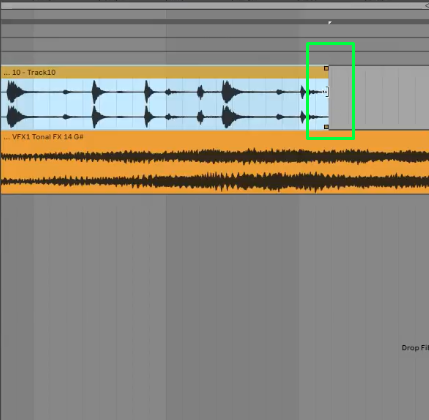
- Holding Shift to Warp Clips:
A new feature in Ableton 10 allows you to stretch audio, while pressing the Shift key. This should make it the foremost utilized, easy feature used for arranging non-rhythmic material.
- find the begging of your loop you want to fit to the rhythm, press shift, then stretch it by dragging to the measure end:
- Apply grooves to apply non-destructive quantization
You would probably go with a normal quantization by select all, click right, then choose quantization. This will align your notes to the grid.
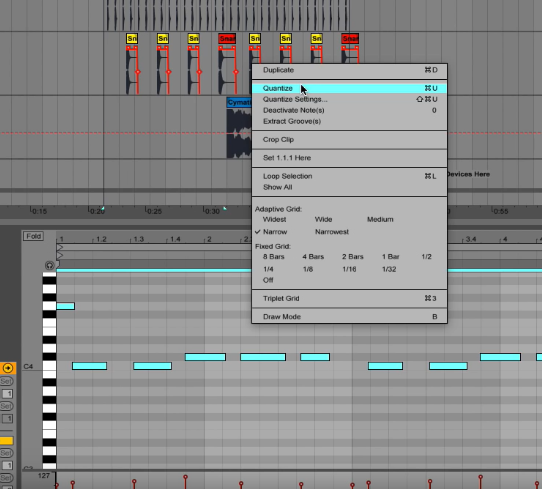
However classic quantization can mean that you cannot rollback to your initial clip. So if you would like to have this more manageable, to allow you to joggle between clips, you can apply a groove from the groove pool.
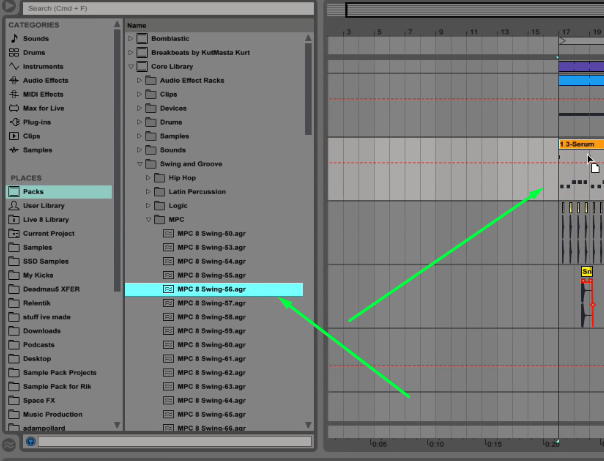
Drag and drop any of your library grooves from within Packs - Core Library - Swing and Groove
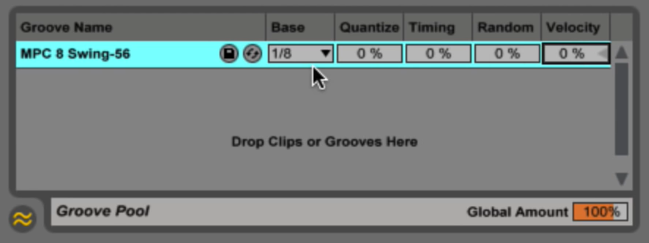
After applying the Groove, hit the Groove Pool button for playing with quantization parameters. If you set the timing to 0, then the clip pattern will stay the same, then if you bring it to 100% then they will be matched on the grid.
- Build your default sets/templates for better mastering and recording:
A really cool way to build your own default view, optimizing your production work. You can name them, group and make sure that every time you start something new, the starting point is already there.
You may find some templates repositories for inspiration, that are completely adjustable and configurable. The whole point of having this one is to make sure that the used plugins, effects and routing is already applied when you want to start something.
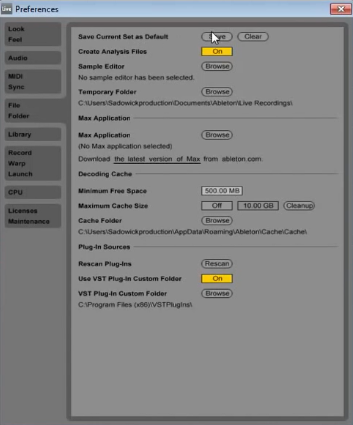
Once all are in check, and you consider yourself ready to go, navigate to Preferences - File Folder - Click on Save Current as Default
- Hot Swap entire written channels audio files:
There are barriers found while mixing your track, when an instrument feels like doesn't fit. After trying to switch the knobs in getting the right sound, a sound swap must came handy. This will replace all your written patterns, replacing them with your weapon of choice.
For example if you would need to change a snare, and the channel is already written down in your channel, you can go to View - File Manager - On the pop-up appearing in your right part of the DAW clock on Manage Set - then inside that click on View Files - click the Swap Button - then choose from your library the desired sound you want to replace with.

That would allow the track to keep all the automation, warping and other effects already added on the channel.
