In this article we are looking to provide you with the basics in constructing a 4 bar length in Ableton Live.
As we are going to operate in arrangement mode, it's easy to apply this in any other DAW, at your will.
There are a bunch of tutorials showing you how to use multiple kicks when constructing techno.
It's not imperative to use millions of layers, as long as you put in mind to put each kick on top of each other, that will eventually emerge into something that's not quite what you aim.
Therefore, there is a basic set of rules to construct kicks from multiple sounds. The following will instruct over creating a multi layered kick, from multiple files.
It's often quite hard to choose the right kick, even when you are using modular. You can choose your start, body and tail at your choice, and the advice would be to do the following:
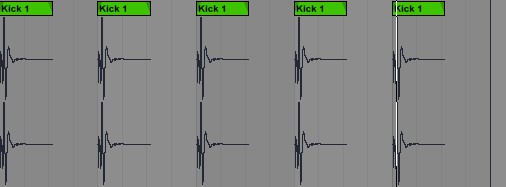
Get in to arrangement view and loop a 4 bar section
Then depending on which part of the sound you would like to start with, create a group of 3 to 6 different audio channels to play with
Click right on each sample or sound, and show fades. This will provide you with a basic envelope to modify which part of your chosen material you want to use

Duplicate to perform the rhythm, and if you want apply some grooves to that to bring even more excitement.
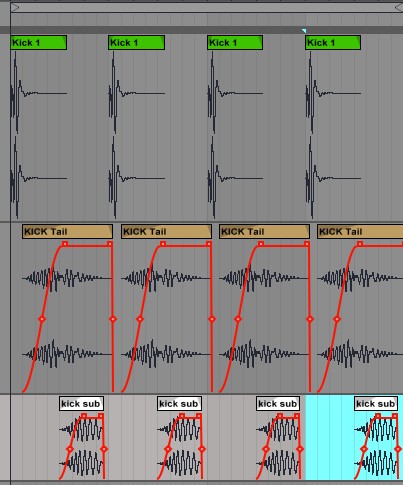
Noting every channel is seen by many a key activity when working with groups. So you can rename your files as your plan dictates. In this case we named them kick 1 (main kick, usually containing the bounce and the click), kick tail (that contains a body doubled harmonically with our main kick) and kick sub (that is practically the sub bass you want to get moving as a tail - in this case)
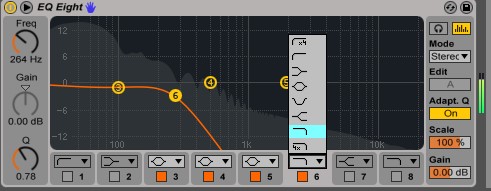
Make sure you operate with a subtractive eq, while making room for other kicks. There are dips to be used on each, depending on what the ears are telling you, but here's an generic example that can be applied to the body or the sub.

Comments