Here’s a succinct, quick and practical guide on how you can get the best of your Ableton Live stock plugins, by transforming them into easy to modulate own effects.
Regardless of your Ableton version, you should be able to replicate each of these quick tips effects. Also, some of them might be applicable with any other DAW, as long as you follow along and parametrize them in the same manner.
Raw sound we're going to explore:
Section 1:
HAAS Effects:
a. Split it down to the sides (HAAS)
Put the delay before other similar effects (like reverb/echo etc.) and turn the filter off
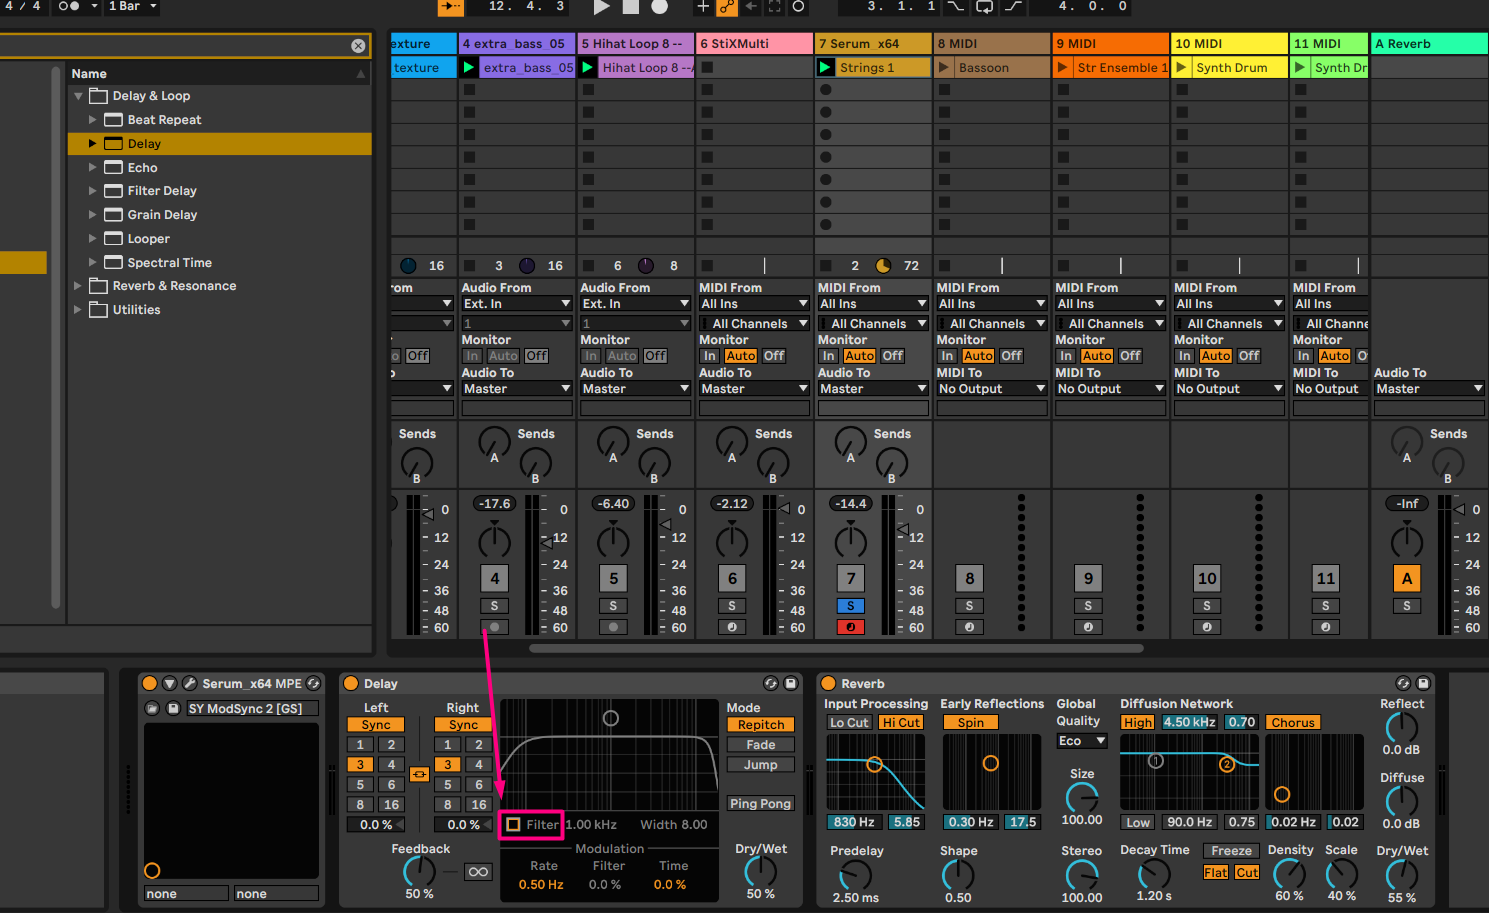
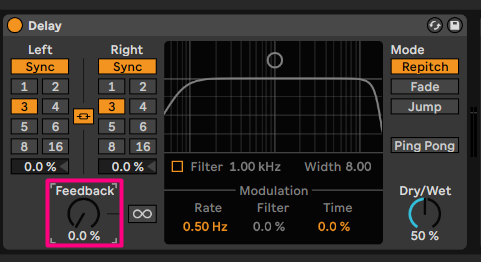
Take the feedback to 0
Turn the sync off on both channels, the delay time set to 1
ms and unlink them
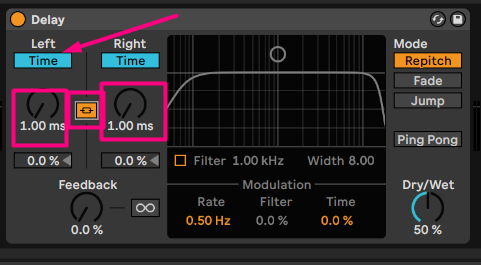
Set one of the delay times (either right or left) to something between 4 and 6 ms
e.g. this one has 1 ms on left and 6 on right
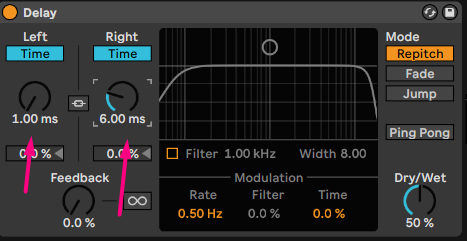
You’ll get that level of space in your element now, switch it on and off to observe the difference.
Output example:
b. Ear candy HAAS
This one has a super power to transform
vocals, leads and any other type of chords (even soundscapes chopped material)
and boost the sweet spots.
High cut at around 2,2 Khz and Low Cut at around 900 Hz, make sure the Q levels
for 2 and 3 peaks are set between 1,5 and 2, then boost at around 1 k and 1,8k.
This will immediately transform the sound into a telephone type of effect.
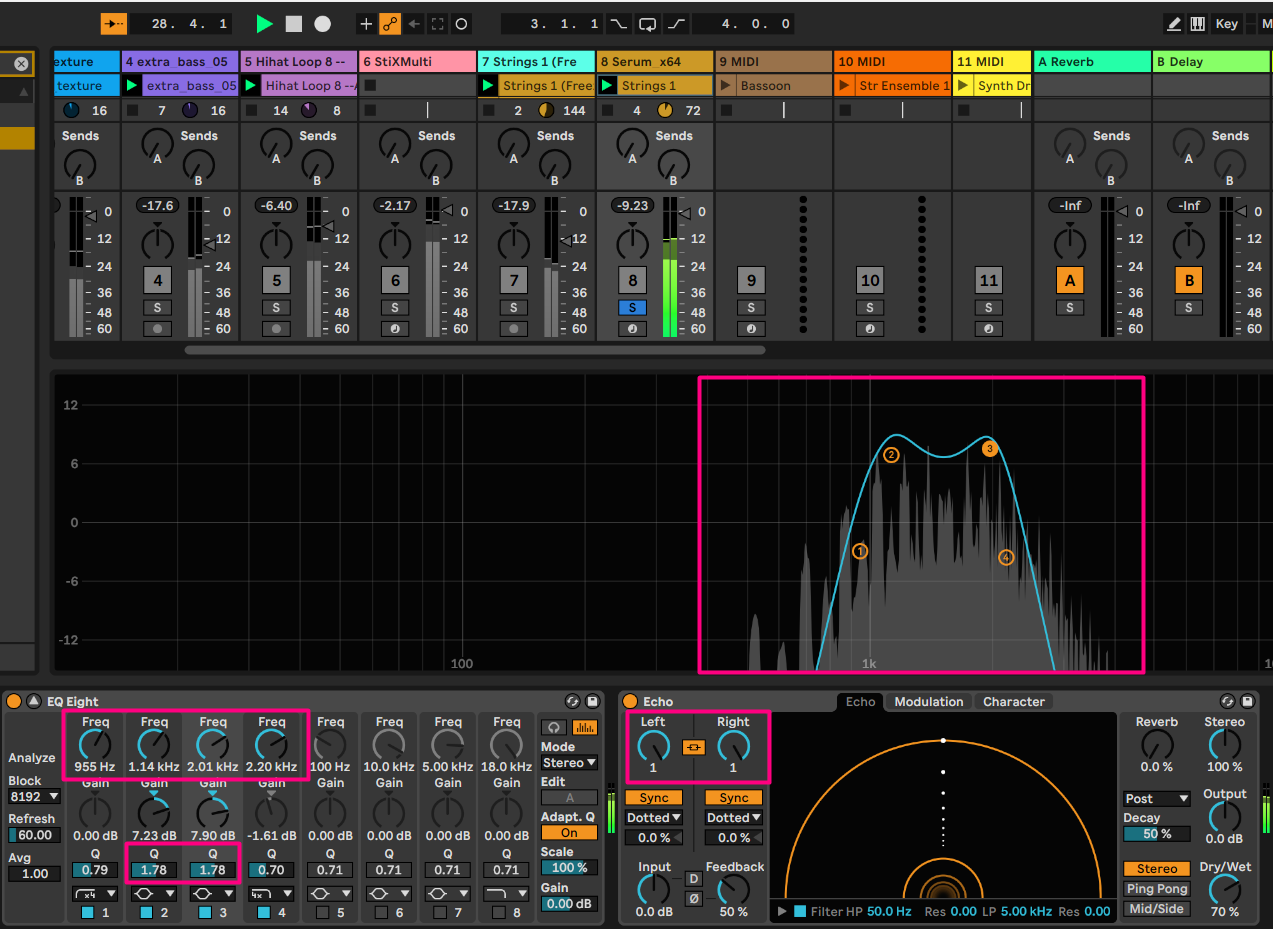
Then layer it with a normal reverb, to get that shimmery vibe unique to every
sound.

Sample output (which can also be used as layered material over the original sample to get a more wider feel):
