That synthetic kick that everyone wants to hear whether we speak about techno or other EDM genres can be easily achieved by just using some of Ableton's stock audio effects and instruments.
Let's have a quick look on how we can achieve that slapping kick that can be often heard in Oscar Mulero, Exium, Surgeon, Rene Wise and most of the dark groove techno.
Step 1:
Doing a white noise track for future synthesis.
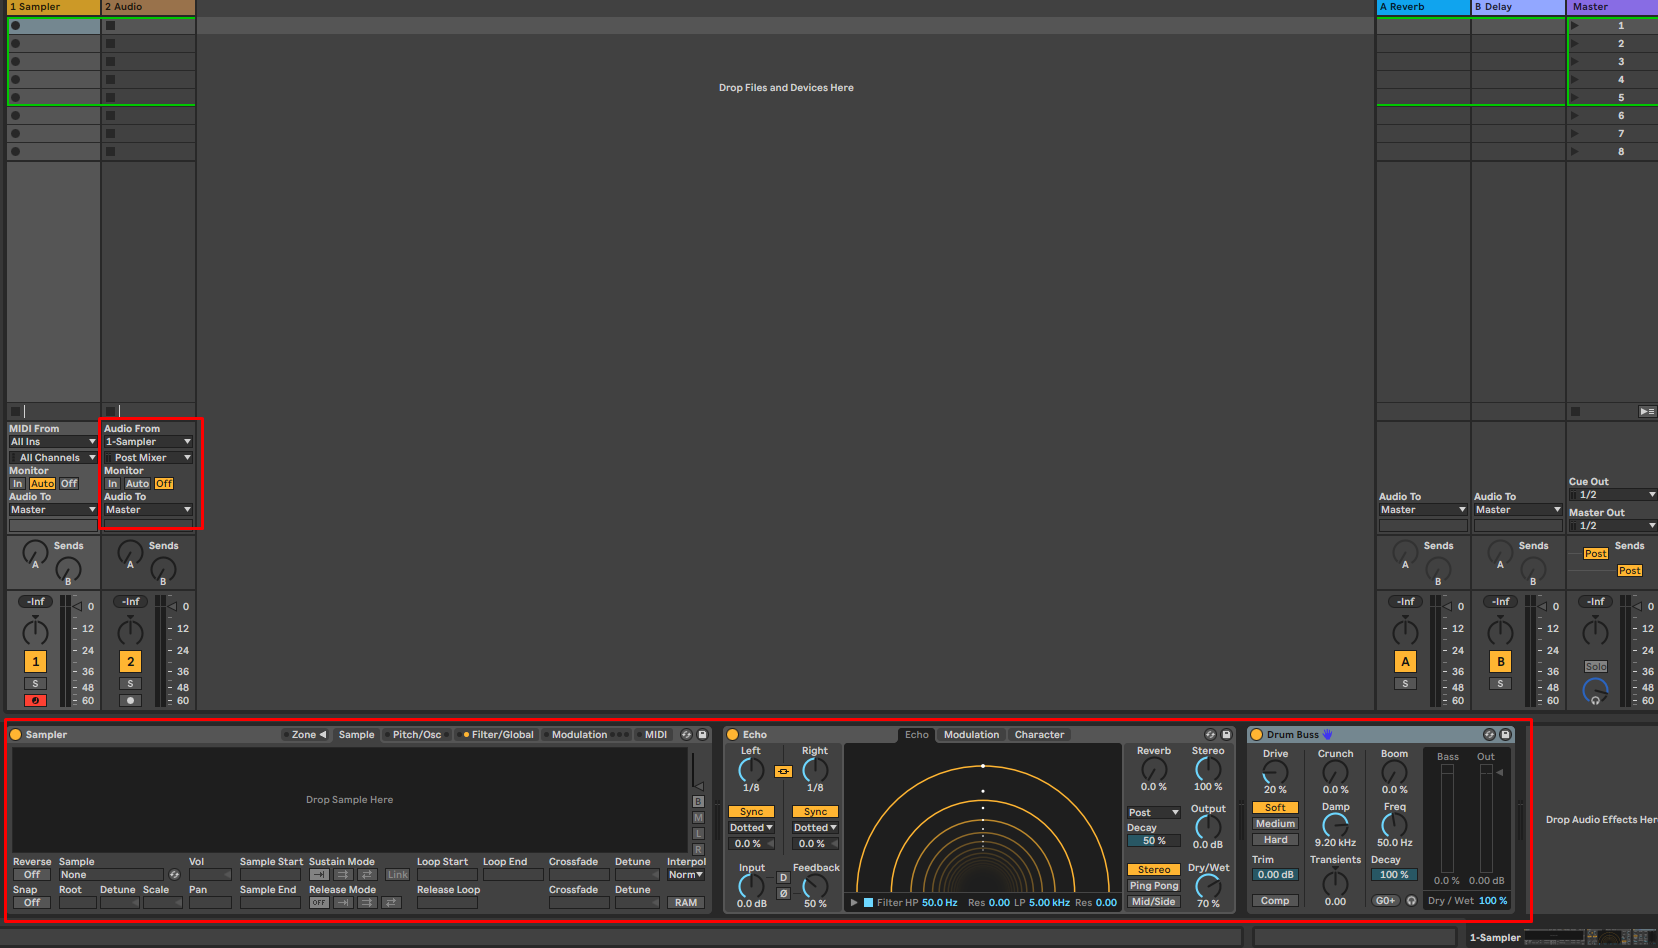
- Double click on Sampler, under instruments, then fill the channel with Echo and Drum Buss
- In the channel number 2 (audio channel) select Audio From: 1- Sampler - this will allow us to record a white noise routed via our first channel
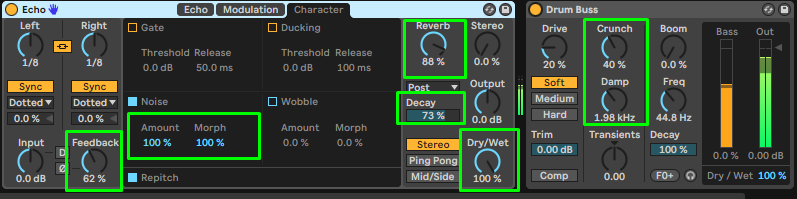
 Go to Character, under Echo Parameters and select Noise, to output white noise, as we will be playing along with these two parameters: Amount and Morph
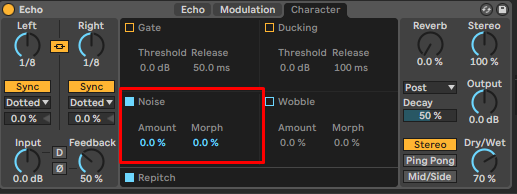
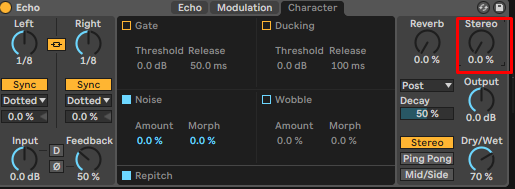
- Put the stereo level down to 0%, as we will most likely need our kick to be mono
- Hit record on track 2, and start playing with
Echo's parameters: Amount, Morph, Reverb, Decay and Delay Feedback (move them up to 100% then back, then find any sweet spots at your will)
And
Drum Buss parameters: Crunch and Damp
The Waveform recorded in the Resampling channel will look similar to the below and we're good to drag and drop the wave in the sampler, on our first channel. 
Step 2 (sample manipulation - synthesis) Now that we have our recorded white noise with reverb and drum buss elements, let's drag it in our sampler, then we can delete the second channel and deactivate the Echo on the first channel. 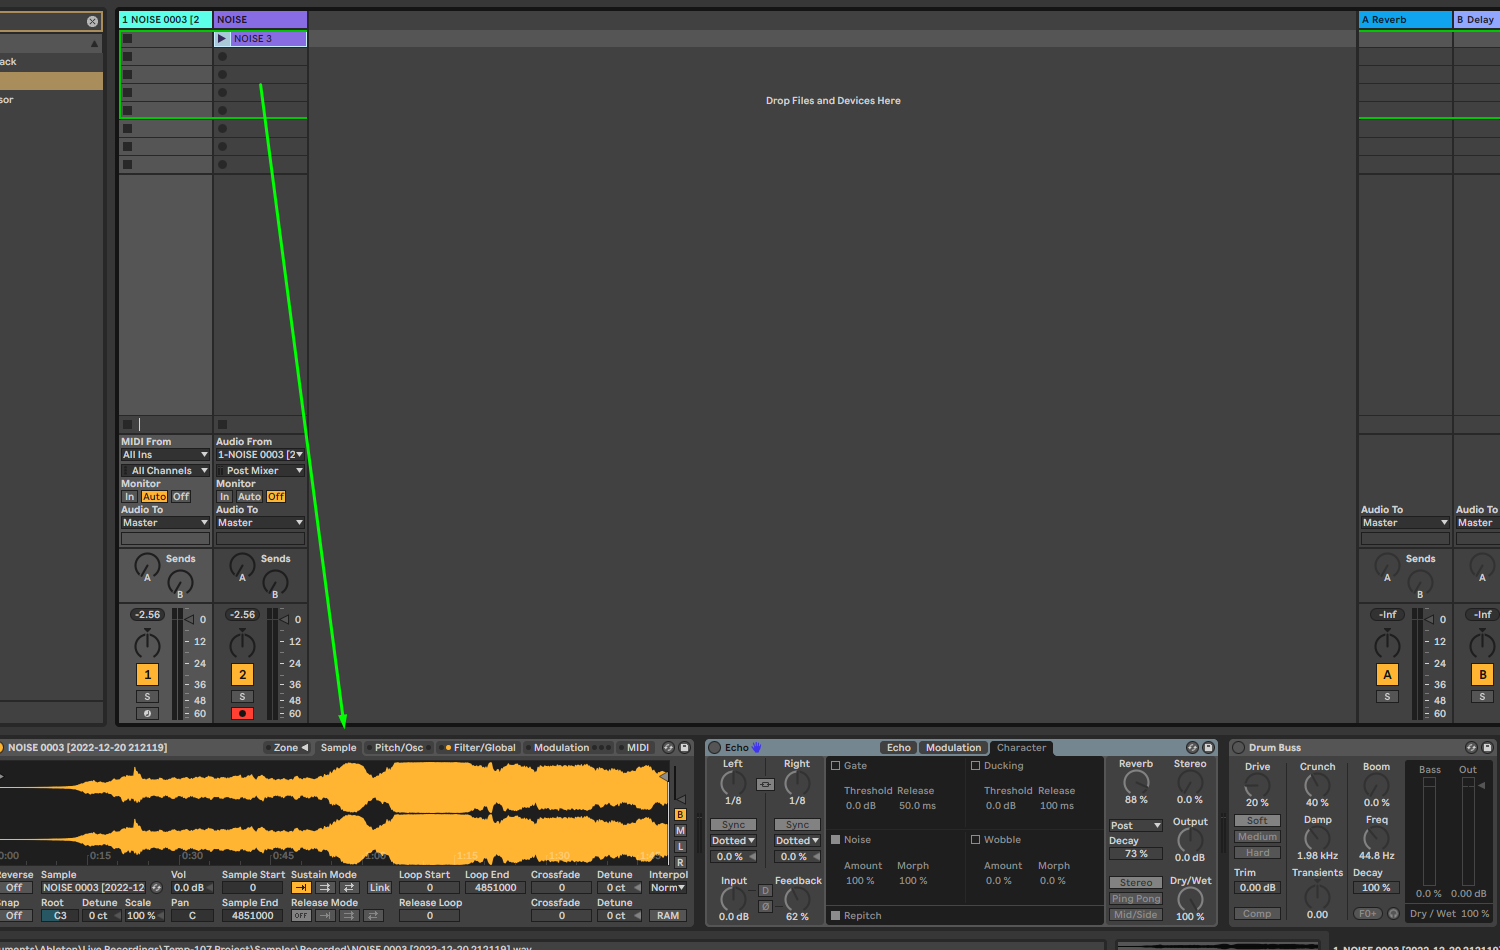
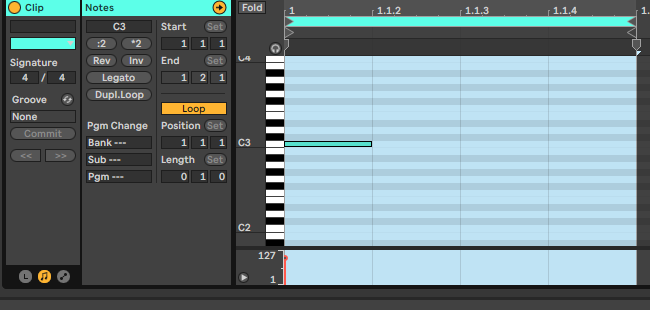
- Let's insert a midi clip and loop one note
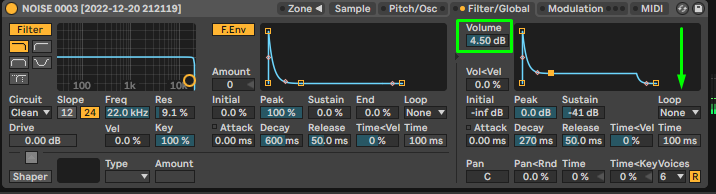
- Going to Filter/Global section now I can adjust the volume and bring the volume envelope down so that I can catch the first part of the note
- Then going to Pitch/Osc and transposing the note down to somewhere between -40 and -50 should do it\
 -
-- Switching back to Filter/Global, apply: 1. A low cut filter like in the image below, find a sweet spot around 30-
- 40 hz 2. Increase the envelope amount to around 20-30 (at your preference) 3. Play around on the graph, or adjust the sustain parameter to approx 13%, and dim down the decay to approx 103 Distort by applying Shaper - Type: Soft, with an amount of approx 20-25 parameter
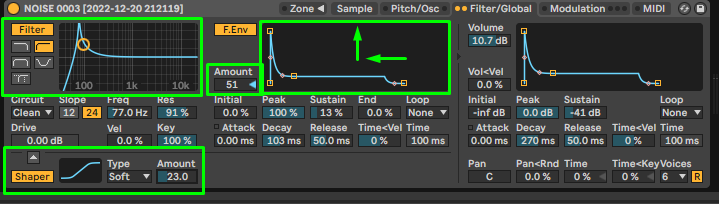 -
-- Finally you can now switch to adjusting to preference: Adjust the kick tail by playing with the sustain parameter under Filter Env.

- Adjust your root note in the Sample section and the starting point at your preference and you will get a wide range of kicks which you can play with.

- Now we can play around with the Drum Buss: having the crunch down to 0 and choosing a Hard distort, adding some boom and Compression could do the trick

- Enjoy the session !
